Have you ever read my blog and thought “I could do that! I travel a lot and take good pictures, too”. While travel blogging isn’t as simple as traveling and taking photos, it actually is the start of a budding career! When I started my travel blog, that was my only skill and I wasn’t even very good at photos back then. This post is going to share exactly how to start a travel blog from scratch the easiest and CHEAPEST way, step by step.
In case you don’t know me or my blog, I feel like I should tell you a little bit about why you should trust me on these tips on how to start a travel blog. I started my travel blog, Hippie in Heels, in 2013 and within 6 months as was one of the top 50 travel blogs in the world, which at that time I made the list with around 65,000 unique monthly views a month. That’s a lot for just a new blogger, six months in. Fast forward to now and I’m still on the list and have worked with travel brands and tourism boards I had only dreamed about back then – and now make nearly 2x (almost 3x) times more annually than I did pre-blogging when I was a nurse. Right now, I average around 230,000 unique monthly views on my blog and have a combined 200,000+ social media followers.
I knew literally NOTHING about blogs or travel blogging when I started mine and googled my way through everything. It is 100% possible to create a travel blog and become successful financially even if you know nothing about it. I’m proof of that.
How to Start a Travel Blog from Scratch
1. Pick Your Niche
It’s important that you think about why you are starting this blog and what will make you stand out from other blogs. When I started, there were so few travel blogs that having a niche other than “travel” wasn’t that important. Now, it’s important. Are you into adventure travel? vegan travel? gluten-free travel? Travel in a specific destination only? Learn more about niches here.
2. Name Your Travel Blog
It’s something you want to narrow down but not pigeon hole yourself. There are a million blogs like Backpacker Bob or Budget Backpacker… these are lame and you should stay away from them! Not only are they lame, but they are overused, and if you do then you’ll be stuck “backpacking” forever or doing an expensive, complicated rebranding down the line. Don’t choose anything that is similar to another successful travel blogger because they will always outrank you on Google. Think about who you are as a person and try to make your personality come through.
I got Hippie in Heels because my friends and I put a list together of words that describe me and Hippie combined with heels showed how I am two different people (a true Gemini) and my niche became India travel and Boho Chic vibes. After a year, my tagline became “a glamorous travel blog” but I’ve since gotten rid of that.
Here are some extra tips on how to choose a blog name.
3. Choose the Domain & Secure the Social Media Handles
You have to choose the domain aka the URL or www in other terms. This is like “www.hippie-inheels.com”. For me, Hippie in Heels was taken by a breastfeeding website that was no longer active. I had to add the hyphen, but this is not recommended. I loved the blog name though and have no regrets!
You need to make sure that your name can be on Facebook, Twitter, and Instagram. If you choose a long blog name that makes it difficult. You can shorten it and abbreviate it but people won’t know what it is when they want to get in touch on the fly, which is annoying for them and will make them less likely to find and follow you. Go ahead and set up accounts in your new name on these platforms to secure them.
4. Buy Your Hosting
I wish I could say that you’ll buy hosting with a great host then never have to think about this again, but that’s not the case. As your blog grows, you will need more resources and will need a better hosting plan which often involves changing hosts. For beginners, Bluehost is the best and cheapest out there (don’t use GoDaddy, just my two cents). Once you hit around 50,000 UMV which takes most people at least a year, you might consider changing to Siteground which can handle more. I went from Siteground (who I loved but outgrew) to A2 Hosting (who I hated) to Performance Foundry where I am now and am obsessed with. I pay $125/month to have servers that can handle my traffic and site size.
I talked with Bluehost and asked them about a discount code and they offered one to my readers aka you! If you use this link to pay just $2.95/month. It’s normally $7.99.
There are some perks to starting with Bluehost and using my link:
- The discount code above makes it the cheapest option that actually has good support
- They will give you the domain FREE
- You can install WordPress with just one-click (OMG, I wish I had this)
- They offer a special 30-day money back guarantee
I’m going to share screenshots now that will literally walk you through the entire setup. You can follow along and within 10 minutes you’ll have your blog totally ready to go. I am dying writing this because it took me weeks to figure this all out and I paid so much more, haha – how things have changed in the travel blogging world! I love how much information is now online about blogging.
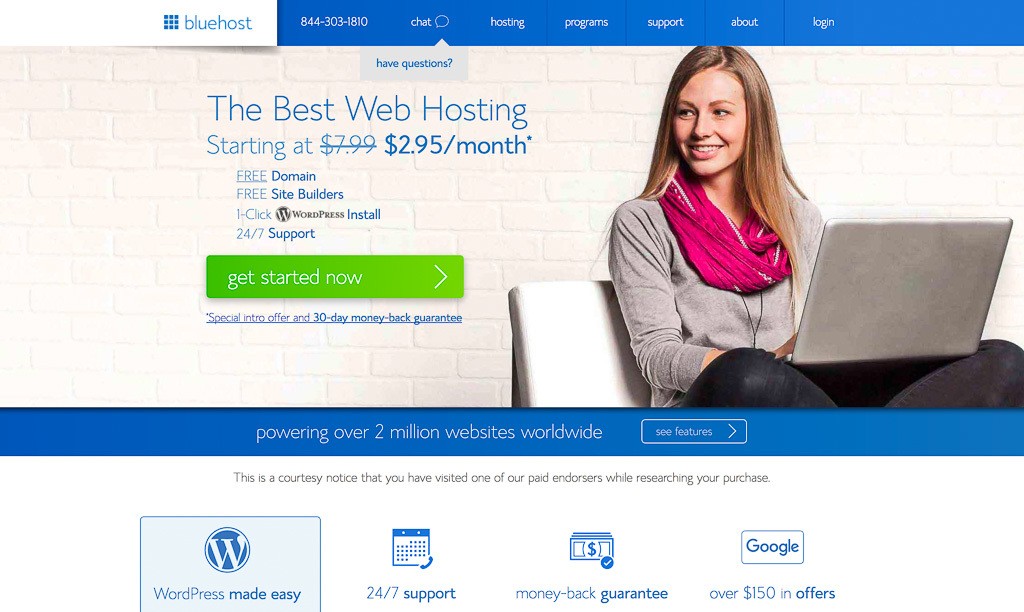
To start, just click on this link and then click the green button that you see in the image below that says “get started now”.
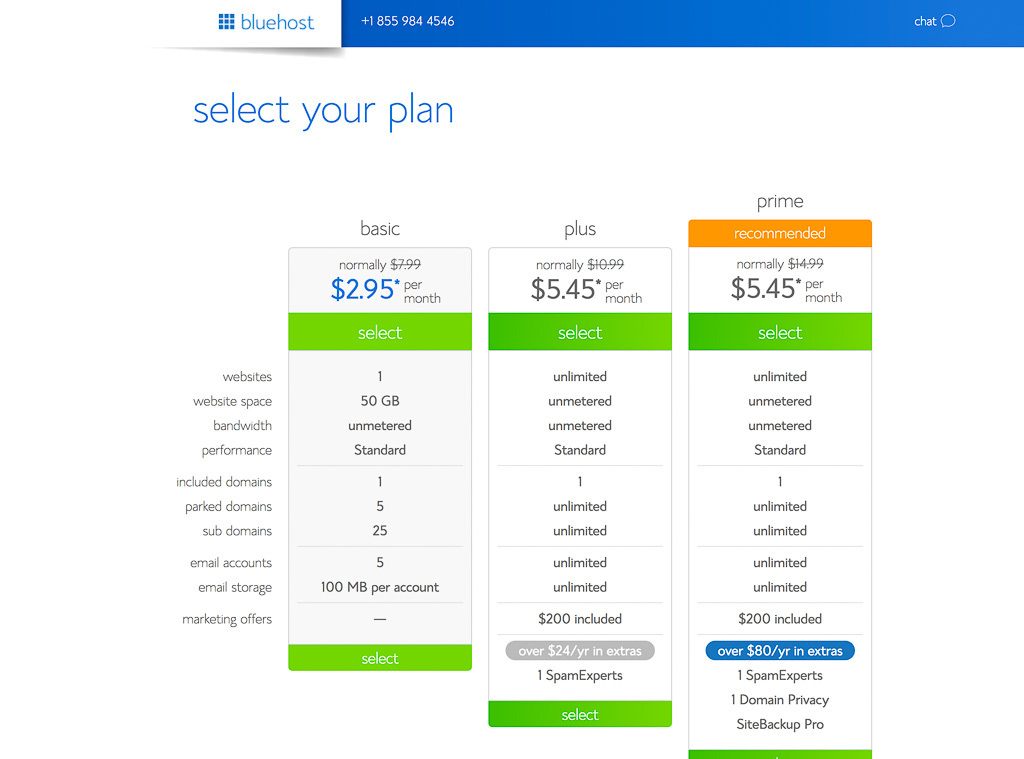
That will bring you to the next page where you can select the plan you want. You’re just starting out so select “basic” as you can see it allows loads of space to grow.
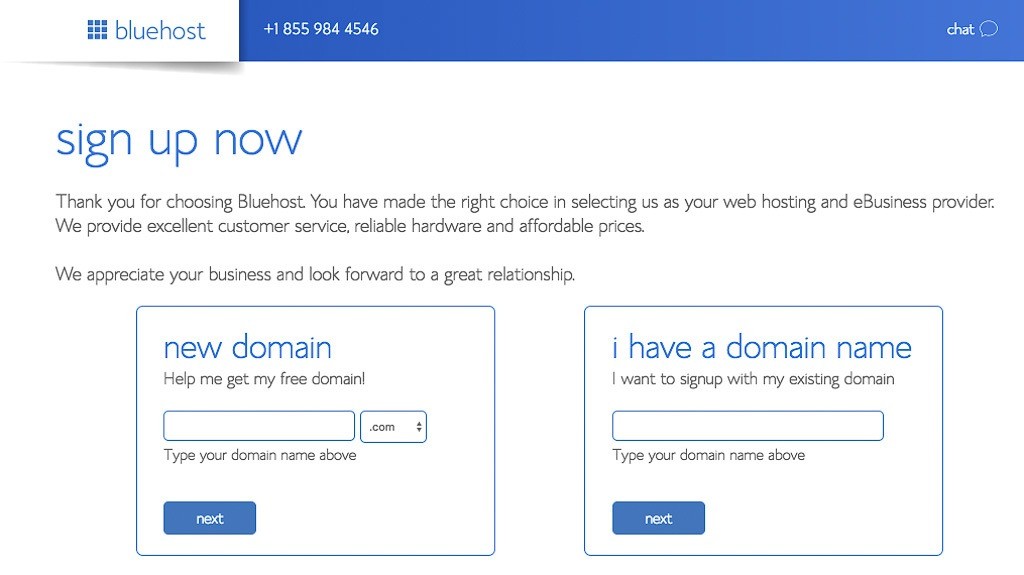
Once you choose basic, then you continue by signing up. You will want to say “new domain” on the next page and type in the domain name you choose above. You will type in only the www.____ and then leave the rest blank as they fill in the .com. You can change the .com to .edu or whatever you want, but as a travel blog, I recommend keeping it as .com.
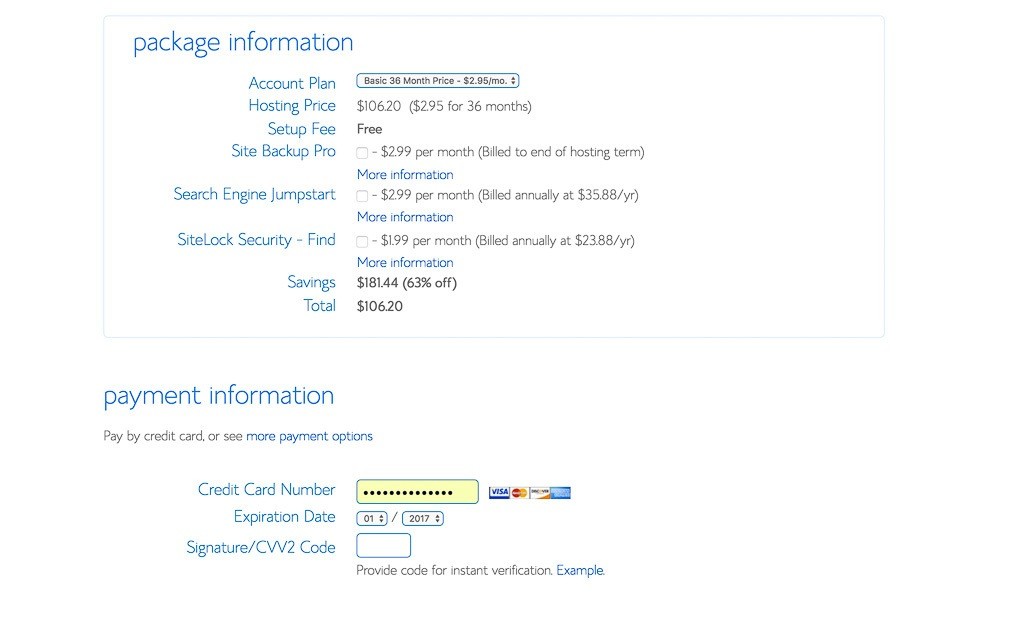
After you click next, you have officially chosen your domain. Awesome! Now you have to pay. Just choose the account plan as “basic” like you already had but then decide how long you want to take it. As you can see it’s a mere $106 for THREE years (less than I pay a month now) or you can pay by the month.
*Hint: if you take the hosting for one year, then need to renew the prices often go up. This is the same with ALL hosts. So, I always take a longer time frame out, at least one year.
If you want, you can click SiteLock Security if you want. It’s more expensive, but it makes your site more secure which means it will show up higher in search results. Every blogger I know switched over this year as Google announced they were taking this very seriously. It means your blog will start with https instead of http. It’s a pain to change later and you can lose domain authority for months after the switch, so I recommend getting it ahead of time. Then just simply put in your payment information.
5. Install WordPress
Bluehost will prompt you to set up WordPress, so just keep chugging along and follow the instructions. The first thing to do is make a password for your account and WRITE it down somewhere because you don’t want to lose this password.

Just click “create your password” from the blue button above.
The following screen will appear:
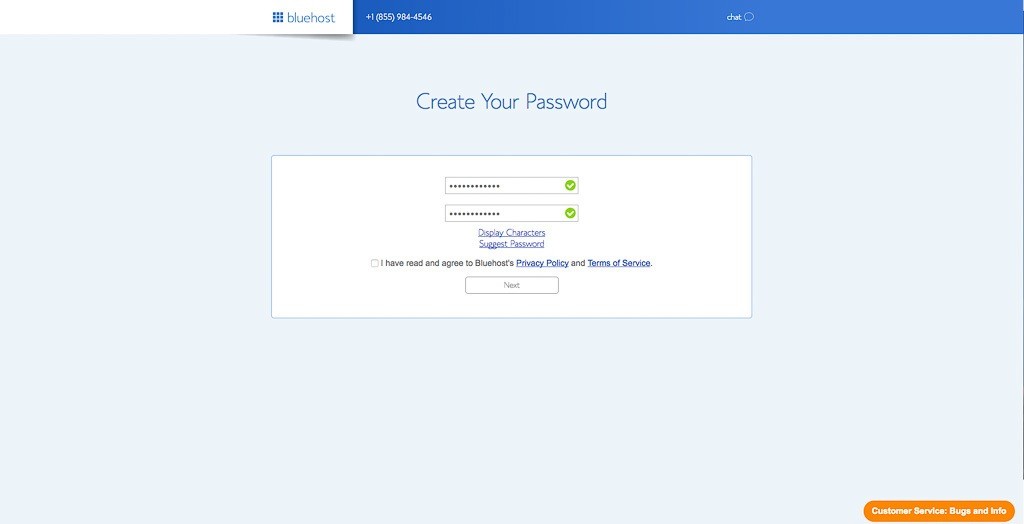
Once you hit next, it will say Congrats! Now you can log in.
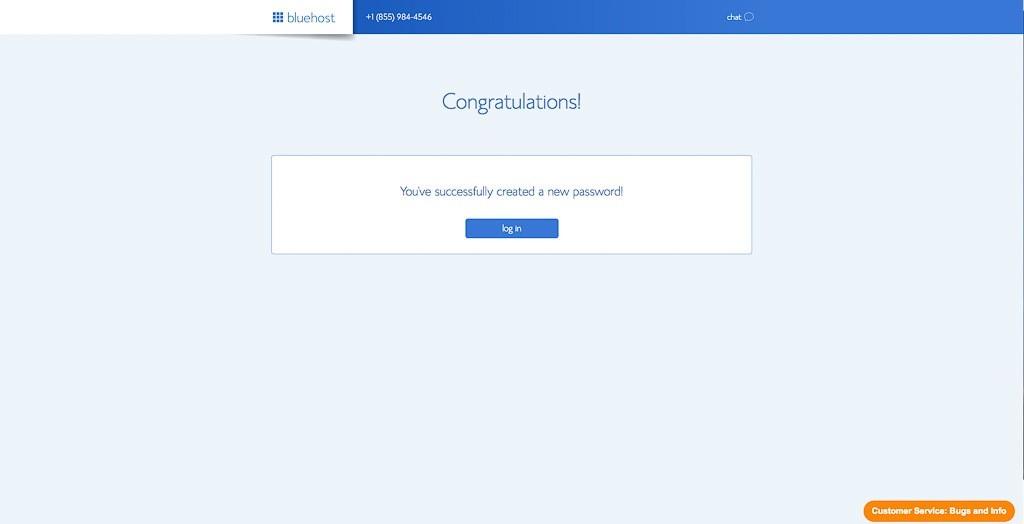
Once you log in, you’ll then get to make a few decisions about how your blog will look.
As part of the setup, Bluehost will suggest a few themes. Just choose any random one, because you’ll change this later.
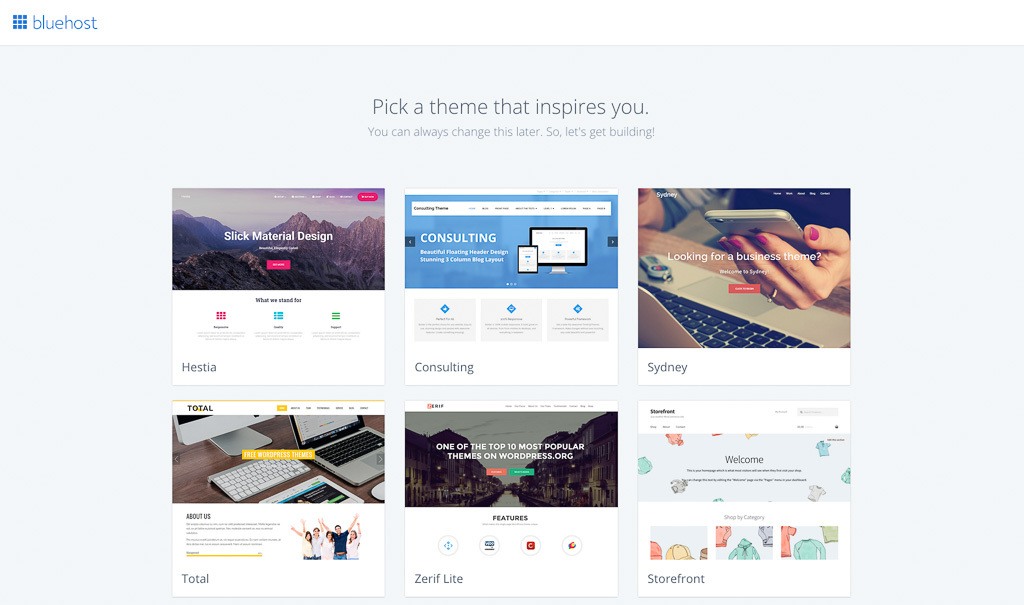
Once you choose a theme you can click “start building” as seen below. How exciting is this!?

There are a few more choices to make. The screen below will be the first thing you see after you choose “Start Building”. You should click “Business” because I’m assuming the goal would be to make money? But, if you aren’t into that and just want this for a personal journal to show friends and family then you can choose “Personal” here.
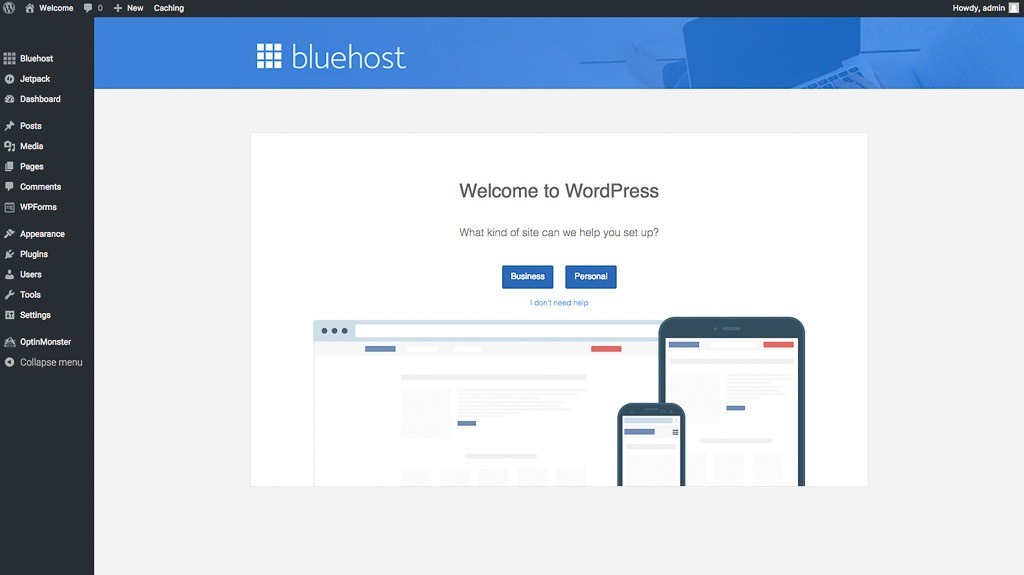
Almost done. You just need to make up a little name for the site. In my case, I would type in for Site Title “Hippie in Heels” and for Site Description “A Glamorous Travel Blog”. Think of the site description as your “tagline”. My first tagline was “an India travel blog”. This can always be changed later.
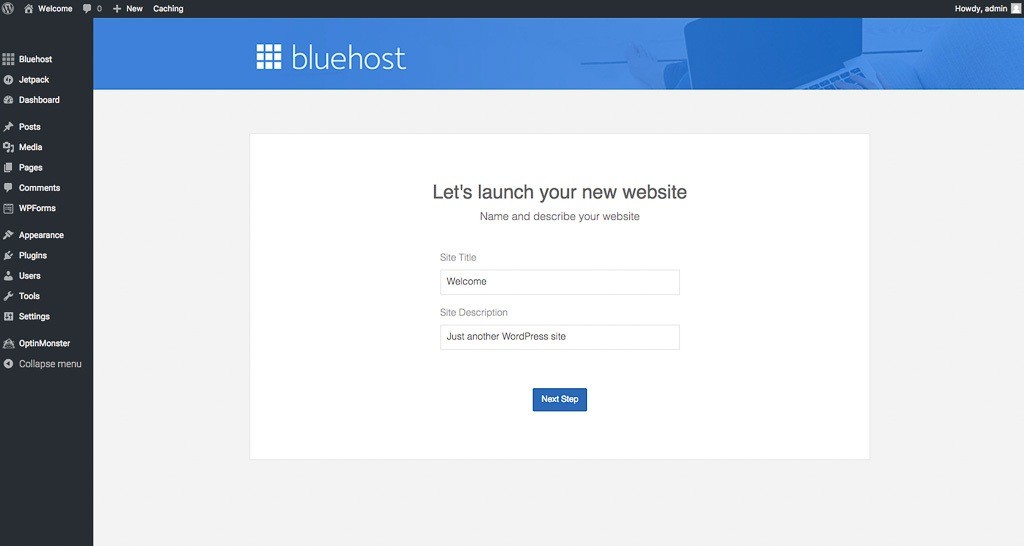
Now the following page will pop up and you can easily click on the blue “Launch” button as seen below.
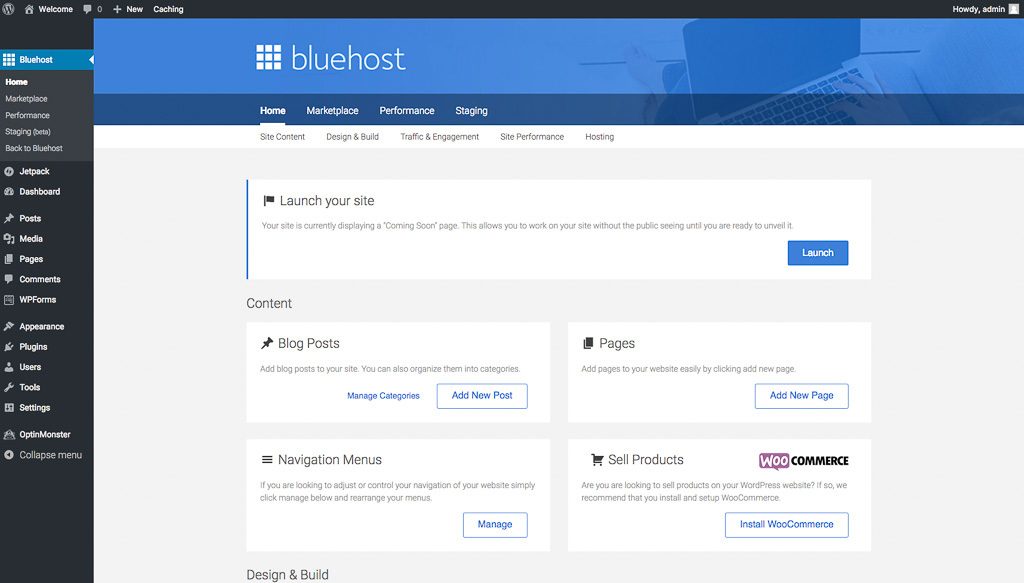
So, you are literally set now. Your blog is real and it’s live! You could click “Posts” on the left and start writing if you wanted to – but don’t. There is so much more you can do to make your blog special and you really should before you take any further steps.
You will want to know how to login if you exit out of this, so the way to do that is by going to www.yourdomain.com/wp-admin and a login will pop up. Just use the information and password you saved from the above account set up and login. You’ll see the same WordPress dashboard as above.
6. Change the Theme
Now, you can choose a free theme when you set up the Bluehost package, and this is the cheapest and easiest way by far BUT many people find changing themes stressful later on, including myself and I highly recommend purchasing a theme that you’ll be happy with for years. There are some things to consider when choosing a theme. You’ll want one that is highly customizable, responsive on mobile devices and is tested to be a theme that does not slow down the site speed.
I cannot say enough good things about my theme, Avada. It’s so customizable and I did a month of research before I settled on this theme, with the help of my developer. It’s capable of pretty much anything. You buy it one time and then own it – no monthly payments.

My homepage looks like the following image:
It’s really easy to add a new theme. You can download the theme, then it will be in a zip file on your computer. Just click “Appearance”, then click on “Themes” then “Upload”. Now just drag and drop that file in. You’ll have to click something like “Install” to make it go live.
Now you can play and customize your site. I recommend just clicking on everything is the left side of your dashboard and getting a feel for where everything is before you start playing around.
You’ll want to know what comes with your theme because that could mean installing fewer plugins later.
7. Install Necessary Plugins & Design Your Site
This is KEY and I have a blog post about the plugins I use on my site and what I use them for. You can read it here. Installing a plugin is easier than a theme. You just go to Plugins > Add New > then in the search bar search the plugin you want. You need to “install” and “activate” it. Once it’s activated it will show up under Settings > and you can click on the plugin from that list and play with the plugin settings.
You do NOT want a million plugins. They do conflict with each other and can slow your site down. Use only what you NEED. Remember that if it can be coded in you should do that rather than add a plugin.
An example of this is if you have to redirect a URL. You can do this with a “redirect URL plugin” or you can add this directly on your server. It would take a developer a couple minutes to do and you could outsource this.
When it comes to design, you can play around and do this yourself by messing with theme settings. It’s very user-friendly inside WordPress so after an hour of fiddling, you’ll easily start to see how it all works. You could also hire someone, but it’s pretty pricey. I talk about my redesign (which I waited three years to do) in this blog post.
Basically, the design draws people in and it will get you more views on your blog and make you look more legit: your logo, header, background. The plugins are what makes everything work. Plugins will add extras that are actually necessary like security, backing up your website content, resizing your images to keep site speed acceptable, and more. Again, I write about this in another blog post.
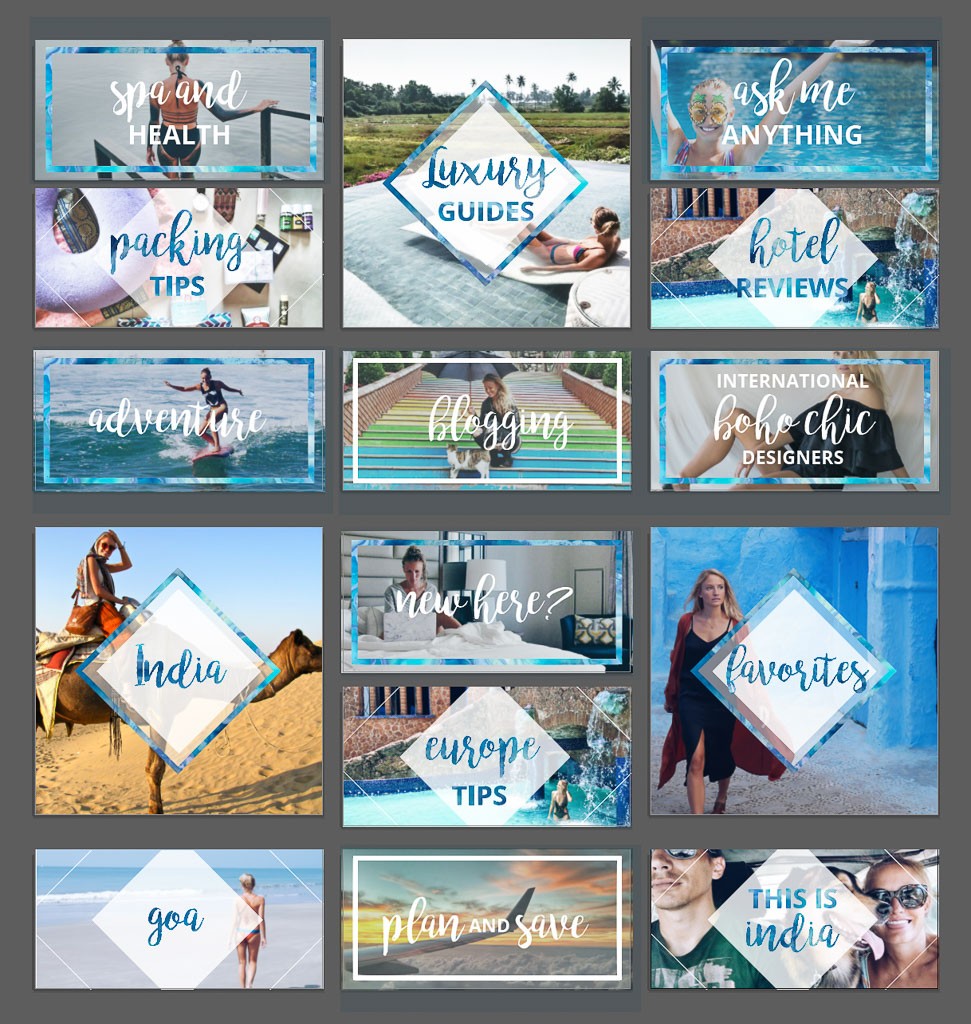
Set up the “pages” and “categories”. Your “about” page is very important. It should show people who you are and what this site is about. You can have other pages like I do (just check the top of my homepage). Categories are like “blogging”, “India”, or “Packing Tips”. Don’t just make this up willy-nilly, put some thought into how you want your site to be organized.
Below is my “Glamorous Globetrotting” page that has some of my top categories. When you write a blog post, you can choose a “category” of the post. For example, this one is under “Blogging”.
8. Learn EVERYTHING about Travel Blogging
When I started my blog there were no posts about starting a travel blog. I kid you not, it was just like diving into something completely clueless. I watched YouTube videos. I cried. It was a lot to take on when I knew nothing about computers and internet. I was as clueless as one could get. I figured it out but it was a stress. You can probably figure it out too!
If you want a shortcut, you can look into the Superstar Blogging Course by Nomadic Matt. He’s the number one travel blogger in the world and is probably a millionaire (guessing, but I bet so). It’s expensive but will give you all the secrets about travel blogging: how to make content go viral, how to get your blog ready for people to see it, how to set up a newsletter, rank on Google, work with brands, pitch brands, and make money. It’s a huge course with webinars from the top people in their fields and gives you access to a secret Facebook group where you can talk with other top travel bloggers and get advice directly from them. This course will put you 6 months to a year ahead of your competition. I wish there was something like this when I started blogging!
You are also going to want to read up on everything about travel blogging, join Facebook groups about travel blogging, network, meet other travel bloggers, comment on their blogs. Be a part of the “travel blogging world” which is huge.
9. WRITE
During all this, while you are learning, making your site WORK, and making it look good – you need to write. Personally, I set aside 6 hours every single day for three months and wrote and wrote… it was neverending. I wrote about all my travels. I used my journals as help when I forget where I stayed or ate. I didn’t go live until I had about 10 posts already live and 30 in my “pending” folder, ready to go.
You will need to edit images and have them added to your blog posts, too. This all takes a lot of time but it’s the fun part! Make sure you are using blogging tools like Grammarly for spell check and keeping SEO in mind (something Nomadic Matt’s course will teach you). Be sure to tell funny stories and be yourself!
10. Go Public
Once you have a bunch of posts live and have been networking on social media, it’s time to start sharing those blog posts with people. It’s time to show the world your travel blog!
Read More:
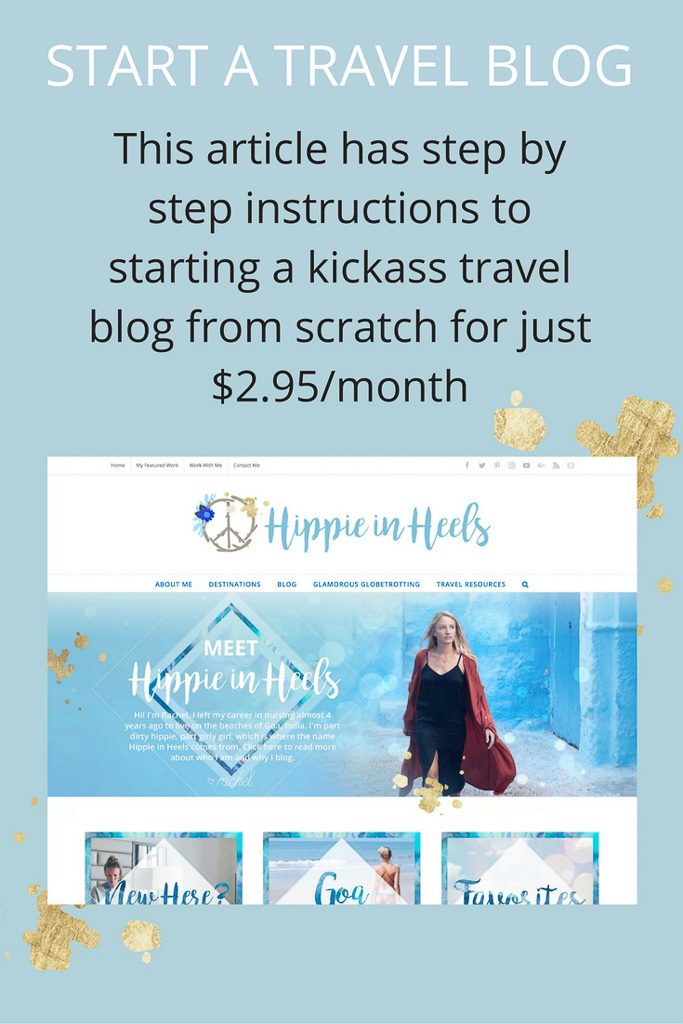
Pin how to start a travel blog for later:
There are affiliate links in this post. I will make a commission with the purchase of some items mentioned here at no extra cost to you. I only promote things I belive in!



Eeek this makes me so excited to get started. Your blog was one of the first travel blogs I fell in love with, it’s been incredible to follow you on this journey! Thank you for this post :)
That’s so awesome! Thanks for taking the time to comment and tell me that. I wish you luck – send me the link when it’s ready :)
Hey Rachel .!!such a inspiring and guiding post was looking out for just this ..
keep up the work..!!!
GB:)
Thanks so much! Good luck yourself!
Rockin’ easy steps! Thanks for laying it all out there!
Thanks Dave!
Thanks for the help Rachel. I am just starting out and need all the help I can get.
Wow, thank you so much for all your help Rachel! I love your branded name Hippie In Heels! I have been thinking about starting a travel blog as my boyfriend and I set out on a new journey living out of an RV and traveling around. I feel it will be a great success but I’ve been slacking on “getting going,” maybe because of the fear of failing and I don’t want that because you don’t know unless you try. Your blog motivated me to try and your steps are so easy to follow! That was part of my hesitation, not understanding computers. You’re inspiring! Keep up the good work!
Hey Brittany! I feel you – it’s really scary to put yourself out there. But, think of it as a fun project and see how it goes. The sooner you start writing, the better!
Thanks Rachel, very detailed and comprehensive. I love it.
Very good and detailed article. I followed some of your advice while opening my new website.
This is a great article. Iam currently looking for ways to work & travel.
Thank you for the article! There are some great tips that I will definitely put them in practice! I just started myself with a travelling blog and it’s super exciting but also challenging. :)
Hi Rachel
Thanks for sharing this is an amazing blog and very useful. I have just begun the journey. I haven’t started blogging yet but have run my own website for business for past six years andncant believe I have missed out on the potential perks that come with blogging. My family and I are off next year and we plan to travel and I’ll blog. I have used Avada before I love this theme. Would you mind sharing the themes name?
Hi Rachel , I recently went to Udaipur for My 1st wedding Anniversary and your blog did help me out with planning my days there. Thank you so much.
Inspired from such posts and gaining a wide range of knowledge, I too started my own travel blog. Coming across your article was indeed delightful as I came to know about a few things I did not know earlier. The plans that you talked about looks nice! Thinking to get one such reliable plan for the hosting of my website soon.
Very informative article.I followed some of your advice while opening my new website.Thanks for sharing.
This is an amazing and very useful blog.There are some great tips that I will definitely put them in practice! Thank you for the article!
Excellent info here, I am currently doing some research and found exactly what I was looking for. Thank you!
Really this website is very useful for new bloggers.
Thank you for this wonderful helpful post. Really helpful for bloggers.
The article is very good, I like this content with everyone, I will definitely share the image and the whole article with my friends, thank you and respect you so much.
When talking about blogging, it is not just posing content but also a great website to attract visitors, but it can be most expensive. Thank you for sharing this. It is a more efficient and cost-effective way of blogging!