

Once upon a time it was pretty tricky trying to figure out how to get a tourist visa online. We’ve done a massive update to Rachel’s original guide to reflect how much has changed since she first had to get hers all those years ago. Read below for the quick and easy guide!
PS: Check out our India Guide eBook. After 6 years living there, Rachel’s experiences from backpacking to luxury travel have been put into this 100,000-word book which will help you plan the most amazing trip in India. Read what’s inside and reviews here.
Types of e-Visas for India
The e-visa can be broken down into:
- e-Tourist Visa (30 days, 1 year, 5 years)
- e-Business Visa (1 year)
- e-Conference Visa (30 days)
- e-Medical Visa (60 days)
- e-Medical Attendant Visa (60 days)
Chances are, you’re only going to need to be concerned with the e-Tourist Visa. We do have a post on e-Medical and e-Business visas here if you need those.
There are 3 options for the e-Tourist Visa are as follows:
- One Month e-Tourist Visa: Valid up to 30 days and includes double entry.
- One Year e-Tourist Visa: Valid up to 365 days and includes multiple entries.
- Five Year e-Tourst Visa: Valid up to 5 years and includes multiple entries.
Important Note: For the 1 and 5 year visas, this does not mean you can stay in India for the whole time. You must exit the country after 90 days. If you’re from the US, UK, Canada, or Japan, you can stay for 180 days before needing to leave. If you have multiple entries selected then you are able re-enter India but you must leave before your visa expires and continue to stick to the capped number of days per visit – 90 or 180. For visas that allow you to stay longer, check this post for USA applicants and this post for UK applicants.
FAQ About the India e-Tourist Visa
Which airports is the e-Visa valid for?
Airports include: Ahmedabad, Amritsar, Bagdogra, Bengaluru, Bhubaneshwar, Calicut, Chennai, Chandigarh, Cochin, Coimbatore, Delhi, Gaya, Goa, Guwahati, Hyderabad, Jaipur, Kolkata, Lucknow, Madurai, Mangalore, Mumbai, Nagpur, Portblair, Pune, Tiruchirapalli, Trivandrum, Varanasi & Vishakhapatnam.
Seaports include: Cochin, Goa, Mangalore, Mumbai, Chennai
You can, however, exit through any other authorized Immigration Check Post (ICP) in India.
Are the e-visas like visas on arrival?
No (unless you are from Japan, South Korea, or the UAE).
If you’ve ever applied for tourist visas to other countries, like Vietnam, those are typically visas on arrival. This means you apply online, get a letter of approval, and at the airport before you go through customs, you go to a separate area where they take your passport and add the visa.
The India tourist visa is not that, though you will get an email of your visa, which you need to print and bring with you to the airport.
Is the e-visa good for all parts of India?
Not all but most. It is not valid for restricted or protected areas such as Northeast India, Sikkim, Jammu, Kashmir, and parts of Himachal.
Can I apply for my visa right before I fly?
No. Even if you rush it for an “emergency visa” it’s going to take minimum of 2 days through iVisa‘s 2 day super rush processing.
Trust me, people get this confused. Rachel got many e-mails from people who didn’t realize until the night before and had to change their flights.
Usually the visa takes about 72 hours to process, sometimes faster. If you haven’t gotten it after 72 hours, you’re encouraged to call +91 11 24300666 or email indian-evisa@gov.in.
Can I just do a one way ticket to India?
No. You must have a return ticket or onward journey booked. This is a serious part of the Indian visa application process and they take it quite seriously. You will often be asked by the airline before you can even board your flight to India.
How much does the e-tourist visa cost?
Base on this calculator from iVisa, the government fees for a US Citizen are:
- 30 Day e-Tourst Visa: $26 USD
- 1 Year e-Tourist Visa: $41 USD
- 5 Year e-Tourist Visa: $82 USD
This should be roughly the same for other countries.
When does my e-visa time period start?
The e-visa will begin from the date you arrive in India.
It’s valid from the date of issue, and you can apply as early as 120 days before your intended arrival date. The latest you are recommended to apply is 4 business days before departure.
Who can get an India e-visa?
Most countries are eligible for the e-tourist visa, but not all. Check this list of countries valid for e-visa to India to see if your country is.
How many times can I apply for an e-Tourist visa?
You can only apply for TWO E-tourist visas in one year.
How to Apply for Your India Tourist Visa
There are two ways we’ll go over in this post. The first is the most straightforward way, which is through the Indian Government website and the other is through iVisa, which Rachel always preferred. We’ll outline both below. First up:
Through the Indian Government Website
Luckily for you, the process has become a lot more straightforward over the years. This way allows you to do everything yourself, and you simply follow the directions the website has laid out.
Warning: Just a word of warning that if you mess anything up with your application or wind up canceling your trip, you can not get a refund and must go through and pay all over again.
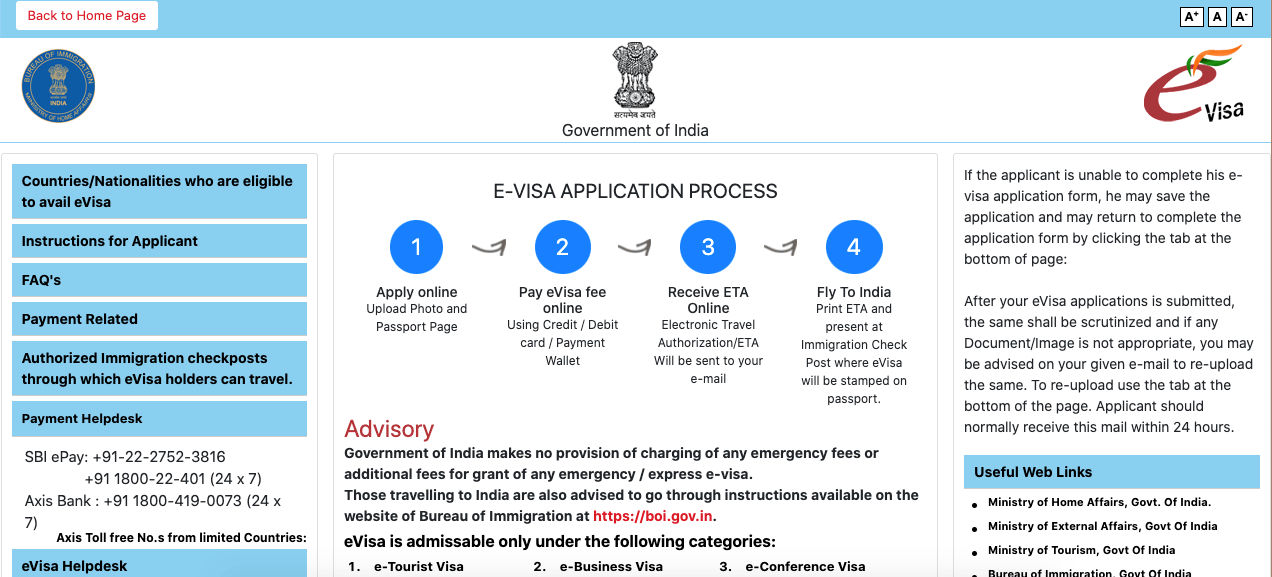
Step 1: Go to this page
This is the government page where you can begin your application. As you can see they now have a lot of information to help you out while you’re applying; including a sample application page.
Step 2: Fill out your application
At the bottom of the web page, click the button for “Apply here for e-visa.” Once you go through the application, you’ll be asked to upload a passport photo of yourself and a photocopy of your passport. Keep the specifications they have for each in mind and make sure your passport has at least 6 months left.
Step 3: Payment
You’ll them come to a page that prompts you to pay now or pay later. If you choose to pay later, you still must pay at least 4 days before arrival. You can choose between Payment Gateway or Paypal. Payment Gateway will have a 2.5% fee while Paypal will have a 3.5% fee.
Step 4: Approval
From there, within 72 hours, you should have a copy of an Electronic Travel Authorization (ETA). Go back to the government website to confirm that your ETA status is GRANTED, and you can always track the status of your application on the site.
Step 5: At the Airport
You’ll need a physical copy of your approval with you at the airport, and there they will stamp your passport.
Through iVisa
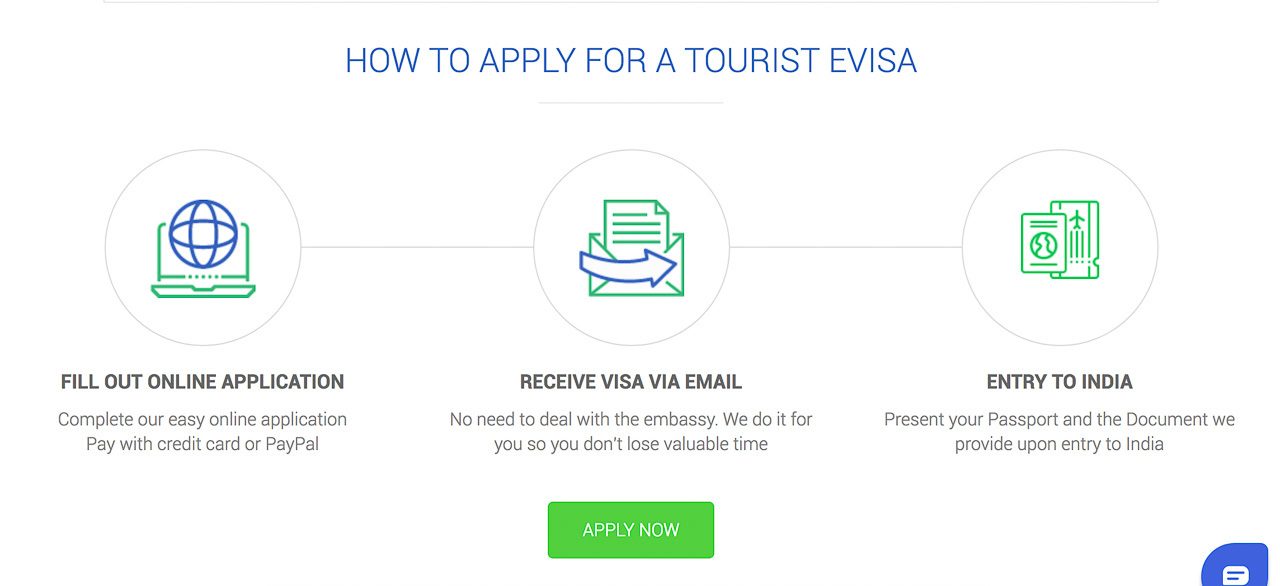
iVisa is a 3rd party site that will handle everything for you for an additional $35 fee. It is the ONLY 3rd party site we recommend.
Rachel always preferred using iVisa and paying the extra fee because often the information around applying changes and can be confusing. And, of course, if you mess up, you wind up paying around $35 or more to redo your application.
Over the years, she had gotten THOUSANDS of emails about getting the e-visa. People have had issues with the government site (card not accepted to pay, site crashing over and over, no receipt of submitting it, and more).
iVisa on the other hand has a “zero frustration policy” and is like an added insurance policy. If for whatever reason you’re rejected, they’ll cover the cost to try again.
Here’s how it works for them:
Step 1: Go to this iVisa link.
Just a note this is an affiliate link for iVisa, which means we make a small commission if you visit through us. It’s no added cost to you, and we wouldn’t recommend the iVisa if it didn’t help countless HIH readers over the years make the whole process hassle free.
Step 2: Fill in Your Information
Simply add your nationality and where you’re traveling to (in this case, obviously India).
Step 3: Pick which e-Visa you want
Choose which e-Visa you want. They offer all the tourist visa options as well as the e-Business and e-Medical. Click “Go to Application Form” once you’re done.
Step 4: Fill out your application
Same drill as with the government site.
Step 5: Choose processing times
- Standard Processing: $35, 5 Business Days
- Rush Processing: $65, 3 Business Days
- Super Rush Processing: $100, 2 Business Days
Step 6: Finish Application and Pay
Finish your application and make sure all your details are correct. Then you’ll be prompted to pay. You’ll get a pop up that says “Status Incomplete.” Just click “Complete Now.”
You’ll then be prompted to make an account.
Step 7: Upload Your Passport Photo & Copy
Make sure your passport copy is in a PDF format and your passport photo has a white background and is in a JPEG format. Click Save + Continue.
You’re done! Click “Save and Complete request.”
Step 8: Print & Travel
Once you hit this, you’ll have a confirmation email from iVisa. Once they have your e-visa, they’ll send it to you over email. Print and show at the airport.
If you have any issues, you can use their customer service, which is available 24/7.
And there you have it! Everything you need to know about how to get a tourist visa for India! It’s not difficult, just a lot of detailed paperwork. We recommend starting the process as soon as you’ve booked your flight so it’s one less thing to take care of.
For More India Travel Advice
Check out some of these posts to help you continue planning your trip to India:
Trip Planning Tips
- The 30 Best Places to Visit in India
- Travel to India Made Easy With This Step By Step Guide
- 100 India Travel Tips You HAVE To Read
- 10 Tips for First Time Travel to India
Logistics
- Travel Insurance for India
- How to Get a SIM Card in India
- How to Book a Train in India As Foreigner
- Do You Need a Filtered Water Bottle For India Travel?
Packing Tips
- How to Dress in India: the Ultimate Dos and Don’ts
- 10 Travel Essentials For India
- Men’s India Packing List
- The Only Backpacking Through India Packing List You Need
Itinerary Tips
- One Month Backpacking India | Itinerary, Hostels, Tips
- My Guide: the BEST Itinerary for India
- Kerala Backpacking Tips & 10 Day Kerala Itinerary
- Have The Perfect Rajasthan Trip By Copying This Two-Week Itinerary
- Goa One Week Itinerary for the Beach Lovers and Foodies
And, of course, we recommend joining the Hippie in Heels: India Travel Tips Facebook group if you have more specific questions.
Pin for later!

If only you had posted this a few days ago. I have been researching it for a few weeks and literally just went through the whole process yesterday. It was so damn painful! The website itself was constantly redirecting me back to the Indian visas online home page before the form was complete. I eventually found that it is better to use internet explorer over google chrome.
On the plus side I received approval the next day.
One thing that you have stated which may mislead some readers is that the visa IS Valid from the date of ARRIVAL. As you have stated, applicants are given a 30 day window period from the date of approval in which they can enter the country however the 30 days in which you can be in the country doesn’t commence until the date you physically enter. Therefore applicant should apply no more than 31 days and no less than 4 days before entry. I hope that makes sense
Much love :)
You’re so right, I wrote that totally dumb! lol I’ve changed it now :) The e-visa is meant to be easier than the paper one, but man the paper one is SUCH a pain! I did my parents a couple years ago and was so annoyed the whole time.
Hi Rachel: My wife and I will be arriving in Cochin just before Christmas 2017 and leaving just after January 1, 2018. What I have read seems to indicate that the eVisa is good for a calendar year that begins in January and ends in December. Does that mean that we need to apply for 2 eVisas each?
Thanks for your assistance.
Ray
Ray, no that would be just one E-visa. I think it just gets lost in translation how they worded it!
I just applied for an evisa for a friend who is arriving in goa in a few days. I used the india government site. It is a bit time consuming ( but nowhere nearly as painful as applying for a regular tourist visa!)
You definitely need a laptop or desktop as you will need to upload a photo of your passport and passport sized photo. And also you may need a bit of photo editing skills because the photo has to be a certain size and megabytes. The passport copy will need to be in PDF format. If you upload a scanned copy of your passport to your computer, it may be in a JPG file. You can google JPG to PDF and there are numerous sites that will convert the file from jpg to pdf for free!
The beneficial thing about the government evisa site is that it is cheap. You don’t have to pay a middleman. It was $48 . It says they will grant the visa within 72 hours. In this case it was granted by the next morning.
Good luck to all!
can i attain an evisa, stay in india for a month, and then gain another e visa while I’m india to extend it to two months?
we will be there in 2 months for HOPEFULLY 2 months
No, you cannot do that. You have to exit after your evisa is over.
My flight arrives in Mumbai at 11:55PM, so must I count that as 1 day? Unfortunately, if I count that as Day 1, then I fly out of Delhi on the 31st day and must use the mail to embassy Visa.
Hello Margaret,
I am not sure. I wouldn’t think so, as by the time you are at immigration it will be the “next” day. You will need to call and double check this.
Thank you, Rachel. My thinkng exactly. I sent an email to india.gov with specific days and flight times. Waiting to hear back, and will also call them if I do not get a response. Thank you, also, for posts regarding demonetization. Arriving in India in mid-Feb., and hoping much will be resolved by then. I am not finding local banks that carry Rupees here in Southern Ohio. Will do further checking.
Hmm I think my parents got them at our small local bank but if not there than you can check with AAA if you have a membership with them – I’m pretty sure they can order the money in.
Here is an update to share from AAA. Stopped by yesterday and was told AAA is no longer getting Rupees. Not any available currently nor will they have them in the future. I will check with the banks after the new year since they don’t seem to have any now either.
wow :( thank you for sharing that update! I have been following the news very closely here and it seems in the north it’s still quite unstable.
I will be taking a flight into Jammu and Kashmir from Delhi. What would I do for a visa in this case?
I think you have to have the paper visa – it should be listed on the site if the region is restricted.
I am in india on an employment visa which is about to expire. I’m booked to fly to Thailand for 2 days, purely so I can return to India on the 60 day evisa as a tourist. Can I apply for the evisa online whilst still in India? (so I have it in hand before I leave India for 2 days and then return) I’m concerned about what address to leave and if they see I’m already in India they may reject my application? Also I’m only in Thailand for 2 days so not enough time to apply from there I think.
Yeah you can’t put an Indian address on there – but you can use a VPN anytime online to change where you “are” in the world so they wouldn’t know you are applying from India. I don’t know how much time you have to wait to come in after an employment visa expires or the rules on that front. You need 4 days technically but you can rush with ivisa and do it in 24 hours.
Thanks Rachel! I spoke to the ivisa people last night who said the same – will look to use their 24hr service! And fingers crossed there’s no waiting period between visas…. PS Being an India freak, I love your blog :)
Thank you for this. I applied and got an email saying “Granted”. Is that email the document/evisa I print out and bring? I was expecting something a little more official looking than a basic email. If something more official was supposed to be attached, I certainly want to know sooner rather than later. Thanks again.
Hi, Rachel. I have been trying to contact the support center, but I have not been able to reach its customer rep. I am wondering if you have an answer for my question. I was granted the first double entry e-Tourist visa which allows me to arrive in India between 08/May/2017
and 09/Sep/2017. I made my first entry to India on 21/May/2017 and departed India on 30/May/2017. The stamp indicated the visa expiry
date to be 19/July/2017. Now, I plan to return to India on 12/July/2017 and depart on 02/August/2017.
I am wondering if my current e-Visa is still valid for this trip, or
do I need to re-apply for the second e-Visa?
I’d greatly appreciate your feedback! Thank you!
Hello Rachel,
I am going to India in November (flying into New Delhi), I am going to be applying for my visa from Chiang Mai, Thailand. Is it possible to get the 60 day evisa even though I am not in my own country (USA)? Is the whole thing online or do you need an appointment with the embassy?
Any help would be greatly greatly appreciated..
Thanks!
Emmy
I have brought the 60 day visa, and need something to be clarified if possible! I know entry must be at one of the designated airports (we are flying to Delhi). But does the second entry have to be at one of the designated airports? I.e can we leave india after 3 weeks and enter again across the border from Nepal? We have tried contacting support but they are not giving us straight answers!
Thanks :)
It’ll still need to be an airport that is listed for e-visa as when you re-enter you’ll go through immigration exactly as before and will be separated evisa line or regular visa… if there is no e-visa line you would be SOL!
& about crossing the border – no I don’t think you can with evisa and I know sharell from tripsaavy also wrote something about this saying that she also didn’t think you can as they don’t have the facilities. the evisa is quite new so there are few places that can take it
I’ve tried getting an answer to this for months from various blogs and from the Indian Embassy and ministry in India itself–The Indian Embassy folks wrote me an email and said check its website. I wrote back and said that it’s not addressed there and repeated the question. They never wrote back, nor did the ministry I wrote to. I’ve traveled to India extensively since 1987 and lived there three years ago. This trip, however, a group of us are traveling to NE India and crossing by land into Myanmar. While I have a regular visa, the others got an E-visa because our travel guide in India checked it out and said we should be fine once we get the stamp in Delhi on the first entry. I read on one blog that one person had no problem re-entering. But this is India and what one person does at immigration may be different than what a person at another counter at immigration does (i.e. as long as our first entry is in Delhi, for example, we can leave to Myanmar and re-enter by land).
Judi, from what I understand you cannot reenter by land with an e-visa – you can only enter India at specified places that accept e-visa (they have to have a system set up) which doesn’t even include all the airports in India, only the major ones. They may be relaxed about it and just let you in as it’s a valid visa, but I think technically they are not allowed to.
HI Rachel…It’s so confusing that even my Indian counterparts were having trouble getting an answer to this question for the group of us. I posted on Lonely Planet’s Thorn Tree forum on India a few months ago and was told that a few people had crossed into India from Myanmar on an E-visa that they used to enter India previously by air. And then, this post was answering someone else’s similar question two days ago: “Yes. We’ve had this confirmed by a handful of posters. Your first entry must be by air; the second entry can be by land.” I guess we’ll find out in January! We cross into Myanmar around the 14th or 15th of January (I can’t remember when) and we’ll be there just under two weeks, crossing back into India and then flying back down to Delhi. By the way, I’ll be returning to visit my friend in South Goa; he has a B/B there. I have been traveling through India since the 80s and lived in AP a few years ago. The most beautiful beaches in India are in Goa!
Thanks for your post Rachel. I am here in India on a 60 day e-visa. My visa ends mid Nov. I would like to stay for another 30 days. Is it possible to get another visa and do a visa run in Nepal or Sri Lanka?
Hey – I think you have to wait a certain time in between visas. It should be on their website!
hi Rachel,
My Boyfriend will be travelling from USA to India on e-visa; however after staying for 2 weeks we plans to got to thailand for a week and come back to India. can he still use the same e-visa if the validity is still there?
Hey Sal, yes you can – it’s mentioned in the post here “This used to be a single entry visa. But now you can enter TWICE. As in you can go to Nepal or Sri Lanka, etc, and come back to India.”
Hi Rachel! I don’t know how long I’ll be in India for- maybe 3 weeks, maybe 3 months! If I book an outbound flight is that just money wasted?
Hi Ashley, I’ve only ever had them ask me once for proof of an outgoing flight so you could risk it but if they do ask you’ll have to book one on the spot. You can book on a site that allows 100% money back on cancellations within 24 hours so you can cancel it after.
Hi, thanks for the great article! have you personally used the iVisa website? just checking its 100% trustworthy :)
Hey Kat, yes I have and so have hundreds of readers from my site! :)
Hey Rachel,
My partner and I are looking at booking a 60-day visa at the moment. Unfortunately we booked our trip for 63 days – thinking that going into Nepal wouldn’t count towards the 60-day India passport. We were wrong.
Now, during the application process, we’ve been told that visas are valid from the time of issue (rather than being valid from time of arrival). Do you have any advice on how we should organise our application then? (e.g. it takes exactly 30 days to arrive, so apply 31 days prior to arrival.. etc?)
Also – do you know whether it’s possible to apply for two distinct 60 day e-visas? (so we would use the first for our first 2 weeks, then coming back from Nepal we’d use our second)?
Thanks for any assistance!
kind regards,
Andrew.
The mail-in visa can take various amounts of time so it’s almost impossible to say when to shoot for, but 30 days would be a pretty good guess. I think my last one took only 2 weeks to come back.
For the second question, no you cannot do two back to back e-visas – there is some time limit between applying and a max of two a year but I don’t remember the limit off the top of my head. I think it’s in this article, though!
Hi Rachel,
Thanks for creating this awesome site!
I just want to make sure I have this right. I just applied for my eVisa. If my application gets approved, does this mean I will print out the eVisa, show it to immigration officials in India upon arrival, and then receive my actual Visa upon landing in India?
Syliva, yes you should print it and take it with you then follow the signs for the evisa line. I haven’t done an e-visa myself so I don’t know once you arrive what they do but I imagine they see your paper visa in your hand and just stamp your passport?
Hi Rachel, do you know any more about the “restricted areas” that you cant enter on an e-visa? Im struggling to find info on where this is, its the first ive heard about it! Somewhere said Jaisalmer is that correct? We have a 2 month trip planned around Rajahstan and a little bit of Northern India so need to make sure nowhere is on the restricted list
No the restricted areas are like NE India, Jammu & Kashmir and some others, but not Rajasthan.
HI Rachel, I just want to update you and your readers on something I posted a month ago in response to the e-visa and multiple entries. I’m in Goa now, having brought a small group of friends to India almost a month ago. They entered on an e-visa in Delhi (very simple) and a week later we entered Myanmar from India via the border crossing in Moreh/Tamu. We then re-entered India almost two weeks later at the same border crossing and had no problems. So, this hopefully will help readers who are hoping to come to India first on an e-visa and then re-enter one time via a land crossing. E-visas are not applicable for a first time entry to India at a land crossing because there is not the wi-fi connections that are necessary to process these visas. But if you enter India on an e-visa at the regular entries, you should have no problems leaving and re-entering from Myanmar. It just takes time because there are time-consuming checkpoints on both sides. And everything is done by hand, not computers.
Thank you for sharing Judi – I remember you asking about this in the FB group and we couldn’t find an answer so that’s really helpful! :)
Can you apply for the visa and if you receive it in under 4 days use it before the fourth day?
Yes, it’s issued and valid once it’s approved.
Hi Rachel,
I hope you can help me. We’ve travelled to India a few times and the last time Dec17/Jan 18, we obtained e visas and start from the wait to have then checked and exit the airport – it was 100% easier, cheaper and quicker than anything previously undertaken. We’re looking to travel to India again at the end of the year, and as we star far south and use Trivandrum airport we thought a trip to the Maldives would be lovely and relatively hassle free. I’ve checked the visa status for the Maldives (don’t need one before arrival) but I can’t see if the e visa is single entry? I’m assuming a visit to the Malduves would be classed as leaving India?
Can you help.
Thank you,
Fiona ❤
Maldives is not part of India so yes you need multiple entry – e-visas allow two entries now during valid time of visa which is just 60 days and also look that your old visa wasn’t too close to the timing of the new one as you can’t come in back to back on a new visa
Hello Rachel, can you please tell me do I really need to show my hotel booking or where I am staying for tourist visa? I got return ticket tho.
Hi – My E-visa has an expiration date of September 20th. My flight out of India is at 11.00 PM on September 20th. Is that ok? There are many threads since 10 years ago but none provides a definite answer. Hopefully we can get one here.
Hii, thanks for this it was really helpful. I have a question though. I would like to stay in India for about 4 months. To avoid going through the hassle with the long term visa, I choose Evisa.
Is it possible to reapply for the Evisa another time, for an additional 60 days? and if it is possible, is it also possible from INDIA or do i have to leave india (I am plannning to visit nepal during my stay ) and do the application from there? thank you so much,, i cannot find this info anywhere
Anna, I travel to India a lot. I was last there this past January and February into early March. The E-Visa is only good for two months and two entries. I have been in the situation you’re in and it’s a hassle. I do not think it is possible to apply for the E-visa from India because they’ll see that you haven’t even left India yet. They won’t let you extend it either–I have tried. You can possibly apply for it from Nepal but I have no idea. It’s really a lot easier to get a regular visa that will be issued for either five years or ten years. (it’s at the discretion of the visa officer; I have always had ten year visas, and when I went to renew mine two years ago, I applied and paid for the ten year visa and a five year visa was returned to me!)
.
Hi Rachel, hope you can help me. I already have an approved evisa. However, i booked my travel tickets on dates different from the ones I indicated during my evisa application. But my confirmed travel dates is within the visa validity period. Will that be okay? Or the dates on the application form should be strictly followed? Thank you.
OMG, Rachel – you are a star! Spent 3 days in Sumatra trying to do this damn form and kept getting thrown off, server going down etc and thought it was just the bad wifi there hehe. Left early from there to KL to get the very frustrating form done only to find the same thing…
My daughter sent me to your blog and, voila !!!!! Thanks for saving me from a meltdown x
Hi!
I am in India now with the 2 month E visa.
I would love to extend it without leaving the country.
Do you know anything about this?
Trying to find info about it but cannot really find any recent information about it..
Thanks a million!
When my visa was almost up, I looked into extending it in-country but was told, by various authorities, that I would have to leave. I went to Bangladesh and then returned.
I have the same problem coming up. I am on an Evisa (business visa) I will have to stay at least 4 months now as plans changed. I think I cannot extend this Evisa… so I will have to fly to Sri Lanka or somewhere and get another Evisa right away. So you had no problem leaving the country and right away applying for another evisa?? There is no particular rule about a gap? On many sites they say only a gap is required if from certain countries like China, etc
You cannot extend the evisa so yes you have to leave, reapply and come back. it will take at least a week and you can only do this 2x in a year.
Hi Rachel, I am going on a cruise that stops at 3 ports in India in early January. I applied online, but just noticed that I put Jan 10th as my entry date, but the cruise actually goes to the first port on 1/6. Is this a problem or is the visa good for any start date once it is issued? Also, will 3 ports count as 3 entries or do they consider it one entry at the first port and only until we exit the last port? Thanks!
Thanks for this helpful info. I noticed my same question has come up before, but not such a clear reply…. I want to get an Evisa – Business visa. I will stay Nov 20 – Jan 7, then fly to Colombo shri lanka… then I need to come back for more meetings right away on Jan 12 and stay again until March 7. These are 2 trips of 2 months with only a 1 week gap between trips… *Can I apply for another evisa within a week from my last visit??? A few years ago there was a time gap required between visits, but I remember when this changed. Now most info online is saying that restriction is only for certain nationalities like China, Afghan, etc. *What is the most offical website to find this updated detailed information? thanks for your help!
Hi Colleen,
If it’s four months than you will have to leave re-apply and come back in. You can have two evisas within a year and it shouldn’t matter if they are back to back. All info is here and you can check there as they do change the rules often https://indianvisaonline.gov.in/visa/index.html
Hi Rachel I find all info very helpful and interesting. Is the visa valid for 30/60 days as I seen valid for different time in different comments .just don’t won’t to go over my stay and be sure .
Thank you for your great help
60. It was 30 when this post was first written, hence comments about that but in 2017 it was changed to 60.
Just got your blog after reading I can say it’s the great blog for those who are looking for the Indian visa. Thank you so much Rachel for sharing this….
I see that the Indian tourist Evisa is valid for 60 days, I’m planning on leaving after 59 days (to Bangkok for 5 – 7 days), can I apply for a second e-visa after and then return a week after leaving? I have an American Passport if that makes a difference. I don’t think i have time to get a traditional 6 month tourist visa before i leave and would like to spend at least 90 days in India between mid Jan – April. I am fine with with taking a weeklong visa run to another country
Hi Steven- I have a similar itinerary to you, including plans to go to Bangkok to apply for another e-visa to re-enter India and stay for two more months. We’re you successful? How long did you have to stay in Bangkok before you were granted the second e-visa?
Hey there, thanks for the useful information you are providing! Do you have an idea if e-visa’s are valid if you travel overland?
Thank you for all information. So I read all your posts and all kind of bloggs out there but Its so hard to get the whole picture of what a double entry really means. How dose it work really?
I have 60 day E visa with double entry for 120 days.
If I leave the country before these 60 days, and enters India again within these 60 days. Lets say on the 59th day back in India again.
Do I just arrive at the airport with the same visa I had the first time?
Or do I need to do the whole process again and apply for a new Evisa before I coming back on my 2 entry of the double entry.
Do I need to pay the fee again to enter again event though I have double entries.
I need to get this explained in detail in every step as I am a5 year old kid thats needs to get the whole picture in one answer. Lol
Thank You
Hello, not totally sure I understand your question but the 60 day evisa is only for 60 days. so you can leave on day 20 lets say and come back on day 40 but you’re still using those days of the validity of the evisa when you are not there. It starts counting when you enter the country the first time.
Rachel, I plan to get a 60 day evisa. I am flying to Delhi from Nepal. Then, I fly from Udaipur to Mumbai (layover in Mumbai), and then from Mumbai to Cochin. Questions (1) Can I use the evisa to fly from Udaipur to Mumbai? From your list, it looks like the evisa is accepted at Delhi, Mumbai, and Cochin, would I also need Udaipur to accept the evisa if I am departing from Udaipur? (2) I understand the flying from Nepal to Delhi will count as one usage of the evisa. Does flying within India count toward the 2 entries? Thank you!
once you are in india, you don’t need a visa or to even show passport – you can book domestic flights showing your driver’s license if you want!
Howdi, great article… I’m from Ireland and hope to be able to get one if these EVisas…
My question is .. We leave for our travels April 19th but don’t head to India until next April ..
How long is this Evisa valid for and do I have to do it from Ireland ..
We have not decided on dates/flights etc… Hope to book these nearer the time…
Defo won’t be back in Ireland before India.
I do hope this makes sense :)
I’m flying from Houston to New Delhi with a layover, then flying to Kangra Airport. I didn’t see Kangra on the list. Is New Dehli my port of entry for the e visa or is Kangra? Wanting to avoid any problems. Thank you.
Thank you for the advice. My visa is a 90 day stay and says entry multiple. I am going india- Nepal and then back to india again all within the 90 days. Is this ok or will I not be allowed back in? It’s cery hard to wrap my head around
Very helpful article!
I accidentally put 2 years on the evisa form where it asks for duration of visa.
Do you think this will get rejected or will they overlook it and just give me the visa for 365 days as stated?
Do you have any contact number or email where I can tell them of this mistake please?
THanks for all the great helpful info! Just wondering if this still applies in 2019? Also do you know how to get a visa for kashmir and NE India?? Thank you!
Hi, I’m looking to head to India for at least 4 months, possibly longer, or maybe going back after my 4 months stint, with about a month in between. I’d like to get at least 6 months to a year visa. Does the long India e-visa still require an itinerary on where you are going, and all of the details of the trip, as it was before with the paper application, or are the requirements less for the e-visa? I don’t have my whole trip planned out, and like to keep things open ended, but can make an itinerary if needed for them also! Are they also less likely to grant you a 6 month or year visa?
Just trying to make sure I have all of my ducks in a row to get it going since I’ve got one month until my trip!
Thanks!!
Hi Rachel, I love your travel blog. So helpful and informative. I’m trying to work out if I’ll need to get biometrics done when I fly into Delhi. I’ll be staying in India for 17 days. I have a connecting flight to Udaipur and I’m worried that if I have to queue for biometrics, I’ll miss my flight.
Great article and info Rachel. One quick question: is the evisa process also applicable for a new born?
This is very helpful. I’m planning to travel Asia for 5 months and visit India toward the end of that time. Is it possible to plan my India visit and apply for my e-visa during the time I’m traveling? Thanks
Hi Rachel,
Just dropping by to say congrats on living the dream :)
Well, currently not thinking of travelling in pandemic. But will plan a trip next year with my family. Thanks for the tips, really appreciate it.
Very informative post. Thanks for sharing…….
I really appreciate from this post…..
This is the article I highly recommend because it contains quality content, I will definitely share it widely for you to everyone. thank you very much